Every garden season we get questions from friends and customers on what to do about poor soil. Here is a short description of how we amended the farm beds at Beech Hollow, and how anyone can do the same thing at home on a smaller scale.
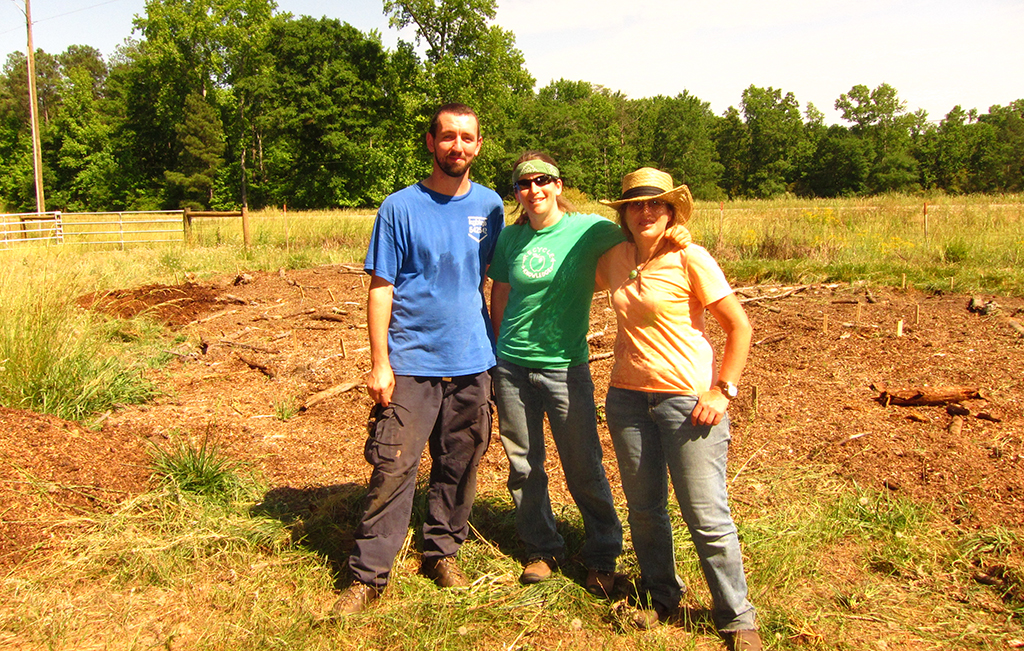
Mike and I had done it. Lordy. In late 2009 we bought 120 acres of land for the cost of a small house in suburban Atlanta. We were going to move my small native plant nursery from a rented lot in Decatur GA, to raw acreage in Oglethorpe County where there was room to grow.
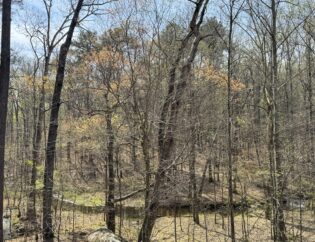
Early the next year, in spring of 2010, Mike and I pushed open the steel farm gate to Beech Hollow’s front acreage and wandered into a small sunny field next to the highway. The open field was about a half acre of sloping ground with loblolly pines lined up along the back edge. Scraps of crab grass sprouted in tufts on the tan sandy soil. I bent over and pushed my fingers down past the grass, and bits of leaf debris.
It was dismal. The soil was rock-hard to the touch. There was little to no topsoil, and not much growing on top of that hard brick of dirt. There were no worms, hardly any centipedes or pillbugs. There weren't even that many weeds besides the crabgrass. We needed something yummy for the plants to grow in.
If we didn't have good soil, our parent beds would fail to produce healthy plants and seeds. I took a shovel and dug a sample of this soil and dropped it into the Extension Services soil test bag. This was one half acre out of 120 that we needed to manage. What could we do to improve ½ acre of soil as quickly as possible? Every growing season we hear this same question from our gardening friends and customers. The most important element most new gardens are probably missing is organic matter. (Soil & Science, click here for a brief primer.)
You want to put a "10 dollar plant in a 100 dollar hole."
That's what Ron told me. You want to put your plant in the best possible situation to succeed. He's right, but it doesn't need to cost 100 dollars...Here's a list of tips for using these techniques at home:
Soil Building at Home, No Tractor Required:
You don’t need a tractor to do this. Using small scale smother and mulch methods at home are inexpensive. This technique can be implemented on a very small scale.
1.) Smother your weeds to make the best use of the existing organic material. We laid two layers of heavy brown paper (48"x 100' long) on top of the weeds. This solid layer of sheet material starves the weeds for light. Paper is "brown" organic material, which is rich in carbon. In a few months' time paper products will become part of the soil. You can do this by adding a paper or cardboard barrier between your weeds and the sun. You can use any uncoated paper to use as a weed block. Several layers of newspaper is great, one layer of old cardboard boxes that are broken down work wonders, two or three layers of kraft paper work.

You need just enough paper material to keep the weeds’ leaves from poking through the loose particles of compost and mulch. We used two layers of heavy brown paper made for contractors to protect floors. If you want to be fancy, there are also rolls of specialty paper made for this purpose sold by organic garden vendors.
Paper based materials are an addition of valuable brown material to your soil, putting carbon rich organic material into your future garden bed.
Because it was handy, Mike and I held down the paper with CWD (coarse woody debris.) The previous decades of tree farming on the property had left piles of rotten loblolly logs throughout our forest. We pulled a few dozen rotting trunks out of the woods' edge. This is very coarse, carbon rich "brown" organic material. These logs were so soft, so rotten, they were half way to becoming soil. (Ten years later, they are now part of the current soil in the parent beds.) This rotting wood continued to break down in place and serve as a moisture and mycology “reservoir." (More information on this free garden resource here.)
2.) Add Live Compost. After the rotten logs pinned the paper down, we added 3 inches of live compost, hoping to further energize the sterile mineral subsoils with more live, organic, brown material. Kickstart your own garden fertility by adding two to three inches of live compost. Compost is best when it is "live," full of beneficial microorganisms: bacteria, microfauna, and mycology. It's not yucky; these are your garden partners. Think of this soil community as "probiotics" for your garden, keeping your plants healthier, more able to withstand diseases, droughts, and other bad weather conditions. Community gardens.

and compost services may offer live compost in your area. If you have to buy compost, please read the bag. Sterilized compost is not alive. If you can't find live compost, scatter bits of soft rotten logs or branches to the sterilized compost. It will help kickstart the biological activity and reactivate your organic material.
3.) Mulch to retain moisture and keep the compost from blowing away. Finally, topdress your fine compost particles with 2 inches or more of coarser MULCH. Free wood chips are great, if you can get an arborist to dump them. One thing you will want to remember: freshly chipped trees are too "HOT" to use immediately with live plants. Fresh wood chips are quick to attract saprophytic fungi and bacteria, and all this biology will tie up the existing nitrogen in your soil, and can end up starving or killing your perennial and annual plants. Letting the wood chips age for 6 months or so will make them garden ready. You will be able to tell when the wood chips are aged; they lose their tan color and become shades of silver to dark grey.
A wonderful and underutilized mulch in American gardens is leaf mold. Instead of taking your autumn leaves to the curb, use them to enrich your mulch layer in the garden. They break down more quickly than wood chips, and in two or three years you will notice quite a difference in the texture and color of your garden soil. And they are free, what's not to love?
At Beech Hollow we often prepare new plant beds 6 months in advance of planting so that truckloads of fresh wood chips would not be an issue. But if you can't wait that long, some tree and landscape services offer composted or aged wood chips. Call and ask!
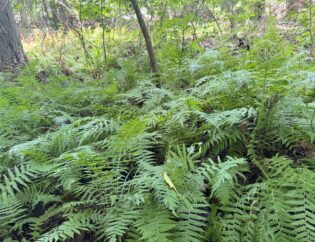
Every year, for the past 10 years, we have added mulch to topdress the gardens after our spring weeding. Here are our beds, 10 years and several inches of topsoil later:
We went from ¼ inch of topsoil, to 6 inches of rich dark topsoil loam.
It looks different, doesn't it?
The plants like it.


Beech Hollow's front beds now...
More Resources/Works Cited:
Ketterings, Quirine and Reid, Shaw. Rao, Renuka. Agronomy Fact Sheet Series, Fact Sheet 22, Cornell University Cooperative Extension. (Cornell University, Ithaca, 2007.) http://nmsp.cals.cornell.edu/guidelines/factsheets.html
Kluepfel, Marjan and Polomski, Bob PhD. Mulch Factsheet, HGIC 1604. Clemson Cooperative Extension Home & Garden Information Center. (Clemson University, Clemson. Jun 20, 2016.) https://hgic.clemson.edu/factsheet/mulch/
Mengel, David B. Agronomy Guide, Purdue University Cooperative Extension Service. (Purdue University, West Lafayette, 2020.) https://www.extension.purdue.edu/extmedia/AY/AY-238.html
“The Ecological Role of Coarse Woody Debris.” EcoForestry, the Art and Science of Sustainable Forest Use. Ed. Drengson, Alan Rike and MacDonald Taylor, Duncan. (Gabriola Island, New Society Publishers. 1997.) 91, 92.